The original aim of this article was to explain Up-casting and Down-casting. Having started writing the article, I was struggling to find an ideal way to describe these two concepts. Having thought further about it, one way I found was to introduce the concept of polymorphism to help explain up and down-casting. This has expanded the article further and when you have finished reading it, you should hopefully understand the three concepts better.
Polymorphism
Polymorphism is a powerful aspect of object oriented programming. According to many searches on the Internet to find a definitive meaning, I have found two that seem to explain it quite nicely, these are "Having many forms" and "Having multiple forms".
Consider the following. Ask yourself, what is a circle? Most would say a circle is a shape. A square, rectangle and a triangle are also shapes. So, what we are saying is a shape can take on many forms or has multiple forms. So how do we implement this concept in C#?
First we need to design our base class, this will be called Shape. Our shape class will implement a constructor that will accept an X and Y co-ordinate and a method that will draw our shape. Below is the code for our shape class.
public class Shape
{
protected int m_xpos;
protected int m_ypos;
public Shape()
{
}
public Shape(int x, int y)
{
m_xpos = x;
m_ypos = y;
}
public virtual void Draw()
{
Console.WriteLine("Drawing a SHAPE at {0},{1}", m_xpos, m_ypos);
}
}
We now need to make our Draw method behave polymorphically. To do this, we declare our method with the keyword virtual in our base class. When we derive a class from shape we are able to implement a specific version of Draw by overriding the base class implementation of Draw. To do this, we use the keyword override when declaring our Draw method in our derived classes.
What we will now do is implement two derived classes from our shape base class. We will implement Circle and Square. This will show how we override our base class Draw method.
Circle and Square derived classes
One thing to note about the base class is the fact that I have used protected variables for the X and Y co-ordinates. Ideally you would use public properties and declare m_xpos and m_ypos as private.
Here are our two derived classes.
public class Square : Shape
{
public Square()
{
}
public Square(int x, int y) : base(x, y)
{
}
public override void Draw()
{
Console.WriteLine("Drawing a SQUARE at {0},{1}", m_xpos, m_ypos);
}
}
And finally Circle...
public class Circle : Shape
{
public Circle()
{
}
public Circle(int x, int y) : base(x, y)
{
}
public override void Draw()
{
Console.WriteLine("Drawing a CIRCLE at {0},{1}", m_xpos, m_ypos);
}
}
Notice, the highlighted code blocks. We have overridden the base class implementation of Draw in each of our derived classes. Basically override tells the compiler that we are intentionally overriding the behaviour of Draw.
We will now test the classes we have written, by putting together a simple piece of code that will create an instance of Shape, Circle and Square and call the Draw methods for each type.
class Program
{
static void Main(string[] args)
{
Shape sh = new Shape(100, 100);
sh.Draw();
Square sq = new Square(200, 200);
sq.Draw();
Circle ci = new Circle(300, 300);
ci.Draw();
}
}
The output generated by the test code is:
Drawing a SHAPE at 100,100
Drawing a SQUARE at 200,200
Drawing a CIRCLE at 300,300
So what's happened that's polymorphic? Well, at this point absolutely nothing! Consider the code below.
class Program
{
static void Main(string[] args)
{
Shape[] shapes = new Shape[3];
shapes[0] = new Shape(100, 100);
shapes[1] = new Square(200, 200);
shapes[2] = new Circle(300, 300);
foreach (Shape shape in shapes)
shape.Draw();
}
}
What we have done is to create an array of the type Shape. Because Square and Circle are derived from Shape, we are able to put them in our array. What we are then doing is looping through all the elements of our array and calling Draw for each of our types. Because we have overridden the Draw method in each of our derived classes the output of our code is:
Drawing a SHAPE at 100,100
Drawing a SQUARE at 200,200
Drawing a CIRCLE at 300,300
If we did not override Draw in one of our derived classes, the base class implementation of Draw would be called. For example, if we declared Draw in our Circle class as follows:
public void Draw()
{
Console.WriteLine("Drawing a CIRCLE at {0},{1}", m_xpos, m_ypos);
}
Our output would be:
Drawing a SHAPE at 100,100
Drawing a SQUARE at 200,200
Drawing a SHAPE at 300,300
By declaring the method as shown above, we will receive a compiler warning as follows:
Polymorphism.Circle.Draw() : Hides inherited member.
Polymorphism.Shape.Draw() :To make the current member override that implementation, add the override keyword. Otherwise add the new keyword.
If we do not want to override the base class method, we need to use the new keyword when declaring our method, for example:
public new void Draw()
{
Console.WriteLine("Drawing a CIRCLE at {0},{1}", m_xpos, m_ypos);
}
This will remove the compiler warning. Basically we are telling the compiler that we are not overriding the base class implementation.
So what have we achieved with polymorphism? What we have been able to do is create an array of shapes and add a specific shape to each element of the array. When drawing each shape, we have not concerned ourselves with the fact that the shape could be a circle or a square. We have simply said, "here is an array of shapes, please draw them!" It is the responsibility of the compiler to discover the real type and to ensure that the correct implementation is called.
Up-casting
Now we come on to one of the original goals of the article. With the simple example above of polymorphism, you should be able to quickly understand what up-casting is, in fact we have already used up-casting in our example.
The diagram below is a UML diagram for our polymorphism example.
Figure 1: UML Diagram For Shape.
Consider the following code:
Shape s = new Circle(100, 100);
We have cast Circle to the type Shape. This is perfectly legal code (as we saw in the Polymorphism example). This is possible, because Circle has been derived from Shape and you expect all methods and properties of Shape to exist in Circle. Executing the Draw method by doing s.Draw() gives the following output:
Drawing a CIRCLE at 100,100
If we had declared the Draw method in Circle as follows, public new void Draw() the output would have been:
Drawing a SHAPE at 100,100
As we have already mentioned, marking the method with new, tells the compiler that we are not overriding the base class implementation of the method.
So why is this called up-casting? Consider the diagram above. From Circle, we are moving up the object hierarchy to the type Shape, so we are casting our object "upwards" to its parent type.
Up-casting is implicit and is safe. What do we mean by safe? Well, we can happily cast Circle to Shape and expect all the properties and methods of Shape to be available.
Down-casting
The flip side of the coin to up-casting is ...yes you guessed it, down-casting. Down-casting takes a little more understanding and you have to be very careful when down-casting types.
To help us better understand down-casting, we are going to add a new method to our Circle class. This will be a simple method called FillCircle.
public void FillCircle()
{
Console.WriteLine("Filling CIRCLE at {0},{1}", m_xpos, m_ypos);
}
Using the example from up-casting, we know that we are able to write the following:
Shape s = new Circle(100, 100);
We are then free to call the Draw method. Having added the FillCircle method to our Circle class, are we able to call this method by doing the following?
s.FillCircle ();
In short, the answer is no. Because we have cast Circle to the type Shape, we are only able to use methods found in Shape, that is, Circle has inherited all the properties and methods of Shape. If we want to call FillCircle, we need to down-cast our type to Circle. Why is it called down-casting? Quite simply, we are moving down the object hierarchy, from Shape down to Circle.
So how do we code a down-cast from Shape to Circle? The code for doing this is quite simple:
Circle c;
c = (Circle)s;
Simply, we are declaring c as the type Circle and explicitly casting s to this type. We are now able to call the FillCircle method by doing the following:
c.FillCircle();
This gives us the following output:
Drawing a CIRCLE at 100,100
Filling CIRCLE at 100,100
We could also write ((Circle)s).FillCircle() reducing the lines of code needed to down-cast our type and call the required method.
Down-casting is potentially unsafe, because you could attempt to use a method that the derived class does not actually implement. With this in mind, down-casting is always explicit, that is, we are always specifying the type we are down-casting to.
The as and is keywords
To demonstrate as and is, lets implement a FillSquare method in our Square class. Our code could be:
Public void FillSquare()
{
Console.WriteLine("Filling SQUARE at {0},{1}", m_xpos, m_ypos);
}
Taking some code from our polymorphism example, as follows:
class Program
{
static void Main(string[] args)
{
Shape[] shapes = new Shape[3];
shapes[0] = new Shape(100, 100);
shapes[1] = new Square(200, 200);
shapes[2] = new Circle(300, 300);
foreach (Shape shape in shapes)
shape.Draw();
}
}
We have Circle and Square in our array of type Shape. How do we know what type we have to down-cast to in order to call the correct routine to fill the shape?
Within the foreach statement, we have to test the type of shape being drawn before we down-cast, we will use the is keyword to test type. We will modify the code above, to ensure the correct method is called to fill our shapes as they are drawn.
foreach (Shape shape in shapes)
{
shape.Draw();
if (shape is Circle)
((Circle)shape).FillCircle();
if (shape is Square)
((Square)shape).FillSquare();
}
Within the loop, we are performing a test to see if the type of shape is a Circle or a Square, depending on the result, we are down-casting our type in order to call the correct fill routine. Our output now is:
Drawing a SHAPE at 100,100
Drawing a SQUARE at 200,200
Filling SQUARE at 200,200
Drawing a CIRCLE at 300,300
Filling CIRCLE at 300,300
I have highlighted the changes our code has made to the output. The alternative to the is keyword is as. We can write:
Circle c = shape as Circle;
The difference is that as tries to cast shape to a type (in our example Circle). If the cast fails, c is set to null. For example:
Circle c = shape as Circle;
If(c!=null)
c.FillCircle();
Conclusion
Quite a lot of ground has been covered in this article. Whilst the polymorphism example is very simple, it gives you an understanding of what polymorphism is and how you could implement it in your design.
The down-casting example is a little contrived. Some of you may be thinking why not just implement a base class method for filling the shapes and override it in the derived classes. The idea of implementing the fill routines as I did was to aid in the explanation of down-casting and has only been done for this reason.
Monday, June 14, 2010
Thursday, March 4, 2010
ICSE CBSE comparision : ICSE vs CBSE after 8th Standard and 10th standard
1. Which Board is difficult CBSE or ICSE
Ans. ICSE is difficult than CBSE
...........................................................
2. Why ICSE is difficult than CBSE
Ans. ICSE is little ahead of CBSE. The course covered by ICSE in 7th standard is done in 8th standard in CBSE.
...........................................................
3. Which Subjects in ICSE are difficult as compared to CBSE
Ans. In ICSE there is more emphasis on literature. The students who do not like literature and Scoial Sciences finds it difficult. Science and Maths are almost the same in ICSE and CBSE.
...........................................................
4. Which board is easy for scoring?
Ans. CBSE is more liberal and students can get better marks as compared to ICSE.
...........................................................
5. Which board should I choose for my kid?
Ans. This depends on the caliber of the child, and his area of interest.
- If the child is not so good at language and literature then, it is better to go for CBSE.
- If you want your child to take up management roles then, ICSE is far better then CBSE. ICSE gives a good command over language.
- If you want your child to score more percentage in boards, go for CBSE.
- If you want an overall better academic growth, go for ICSE because 2% or 5% more is boards does not matter a lot in the overall career. Even if the child becomes an engineer from the best institute, he might not rise in his career if he does not have an excellent command over his language.
- ...........................................................
6. Which board is better close to the engineering / Medical entrance exam?
Ans. Both boards cover complete syllabus that is needed for the entrance exams. CBSE being a little easier, the student gets more time to prepare for various entrance exams.
...........................................................
7. I am in CBSE board, can I switch to ICSE?
Ans. Technically anyone can shift from one board to the other but if you are in higher class, it is not good to change board. ICSE might be little difficult for you.
...........................................................
8. I want to do MBA which board should I choose?
Ans. If you are seriously planning to do an MBA from some good B- School, you should go for ICSE.
Tuesday, March 2, 2010
Powerful Leg & Knee Strengthening Exercises Using Your Body Weight
Knee strengthening exercises like Knee Circles strengthen your knees and legs by using your body weight as resistance.
Do this simple yet effective knee exercise in combination with other stretching and strengthening exercises for the lower body, such as the Forward Lunge, the Thigh Burner and the Forward Backward Bend (see below), and you will develop strong, flexible legs.
Having strong, flexible legs is important for upper body support and goodbalance. Doing regular leg stretching and strengthening exercises also stimulates vital nerve and energy channels from your spine to your toes. Check with your health professional though before trying any new leg or knee exercises, particularly if you have a history of problems in this area.
Knee Circles - Strengthen Your Knees & Ankles

How
1. Stand with your feet together.
Bend your legs and squat down slightly.
Put your hands on your knees so that your palms cover your kneecaps.
Keep your feet firmly on the ground and your eyes focused on your toes.
 2. Slowly and gently begin moving your knees in small, clockwise circles.
 Don't make the circles too big - keep your knees above your toes.
If your feet lift up, it means your knees are moving around too widely.
Do 10-15 circles then repeat in the other direction.
Build up to 25-30 circles in each direction, or simply do the exercise for a couple of minutes 2-3 times a day.
Benefits
- Strengthens your knees & ankles
- Relieves pain & stiffness in your knee & ankle joints
Tips
- Breathe slowly, deeply and evenly through your nose
- Keep the exercise soft - Don't force it
- Stop if you feel any pain
Wednesday, February 17, 2010
C Sharp Window Forms
This page contains a number of C# codes for the Amateur/Beginners in the Visual C# and .Net PlatForm Environment.
This Tutorial will take anyone from the scratch to a good Windows Form creator although I am still learning at my spare time.
Source Code:
//MyForm1.cs
//This Tutorial will Teach you how to create a Form without Caption Heading
using System;
using System.Drawing;
using System.WinForms;
class MyForm : System.WinForms.Form
{
public MyForm()
{
}
public static void Main()
{
Application.Run(new MyForm());
}
}
/*
To Compile make a batch File in Dos Mode as compile.bat
csc /r:System.dll /r:System.Drawing.dll /r:System.WinForms.dll
/r:Microsoft.Win32.InterOp.dll /out:MyForm1.exe MyForm1.cs
*/
OutPut:
Source Code:
//MyForm2.cs
//This Tutorial will Teach you how to create a Form with Caption Heading
using System;
using System.Drawing;
using System.WinForms;
class MyForm : System.WinForms.Form
{
public MyForm()
{
//Text to be Displayed in the Caption-Title Bar
this.Text = "Form Tutorial No.2 From JAYANT";
}
public static void Main()
{
Application.Run(new MyForm());
}
}
/*
To Compile make a batch File in Dos Mode as compile.bat
csc /r:System.dll /r:System.Drawing.dll /r:System.WinForms.dll
/r:Microsoft.Win32.InterOp.dll /out:MyForm2.exe MyForm2.cs
*/
OutPut: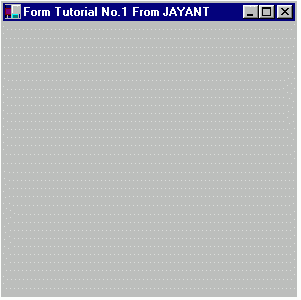
Source Code:
//MyForm3.cs
//This Tutorial will Teach you how to create a Form with Added Functionality describing Size
using System;
using System.Drawing;
using System.WinForms;
class MyForm : System.WinForms.Form
{
public MyForm()
{
//Text to be Displayed in the Caption-Title Bar
this.Text = "Form Tutorial No.3 From JAYANT";
this.StartPosition = FormStartPosition.CenterScreen;
this.AutoScaleBaseSize = new Size(5,13);
this.ClientSize = new Size(400, 200); //Size except the Title Bar-CaptionHeight
this.MinTrackSize = new Size(400, (200 + SystemInformation.CaptionHeight) );
this.MaximizeBox = false;
}
public static void Main()
{
Application.Run(new MyForm());
}
}
/*
To Compile make a batch File in Dos Mode as compile.bat
csc /r:System.dll /r:System.Drawing.dll /r:System.WinForms.dll
/r:Microsoft.Win32.InterOp.dll /out:MyForm3.exe MyForm3.cs
*/
OutPut: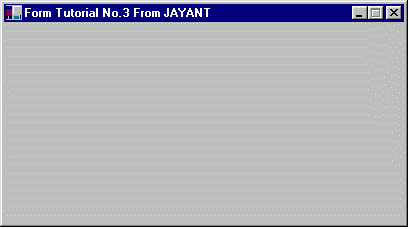
Source Code:
//MyForm4.cs
//This Tutorial will Teach you how to create a Form with Label on the Form
using System;
using System.Drawing;
using System.WinForms;
class MyForm : System.WinForms.Form
{
Label label1;
public MyForm()
{
label1 = new Label();
label1.UseMnemonic = true;
label1.Text = "First &Name:";
label1.Location = new Point(15,15);
label1.BackColor = Color.Pink;
label1.ForeColor = Color.Maroon;
label1.BorderStyle = System.WinForms.BorderStyle.FixedSingle;
label1.Size = new Size (label1.PreferredWidth, label1.PreferredHeight + 2);
//Text to be Displayed in the Caption-Title Bar
this.Text = "Form Tutorial No.4 From JAYANT";
this.StartPosition = FormStartPosition.CenterScreen;
this.AutoScaleBaseSize = new Size(5,13);
this.ClientSize = new Size(300, 200); //Size except the Title Bar-CaptionHeight
this.MinTrackSize = new Size(300, (200 + SystemInformation.CaptionHeight) );
this.AutoScroll = true;
this.MaximizeBox = false;
this.Controls.Add(label1);
}
public static void Main()
{
Application.Run(new MyForm());
}
}
/*
To Compile make a batch File in Dos Mode as compile.bat
csc /r:System.dll /r:System.Drawing.dll /r:System.WinForms.dll
/r:Microsoft.Win32.InterOp.dll /out:MyForm4.exe MyForm4.cs
*/
OutPut: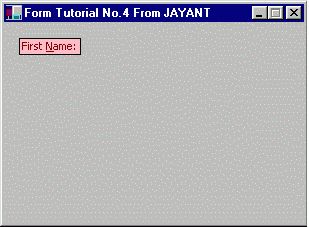
Source Code:
//MyForm5.cs
//This Tutorial will Teach Mouse clicking Events and MessageBox(without Title_Heading) calling
using System;
using System.Drawing;
using System.WinForms;
class MyForm : System.WinForms.Form
{
Label label1;
public MyForm()
{
label1 = new Label();
label1.UseMnemonic = true;
label1.Text = "First &Name:";
label1.Location = new Point(15,15);
label1.BackColor = Color.Pink;
label1.ForeColor = Color.Maroon;
label1.BorderStyle = System.WinForms.BorderStyle.FixedSingle;
label1.Size = new Size (label1.PreferredWidth, label1.PreferredHeight + 2);
//Text to be Displayed in the Caption-Title Bar
this.Text = "Form Tutorial No.5 From JAYANT";
this.StartPosition = FormStartPosition.CenterScreen;
this.AutoScaleBaseSize = new Size(5,13);
this.ClientSize = new Size(300, 200); //Size except the Title Bar-CaptionHeight
this.MinTrackSize = new Size(300, (200 + SystemInformation.CaptionHeight) );
this.AutoScroll = true;
this.MaximizeBox = false;
this.Controls.Add(label1);
this.Click += new EventHandler(clicking);
}
public void clicking(object ob, EventArgs e)
{
MessageBox.Show("You clicked on Form Area");
}
public static void Main()
{
Application.Run(new MyForm());
}
}
/*
To Compile make a batch File in Dos Mode as compile.bat
csc /r:System.dll /r:System.Drawing.dll /r:System.WinForms.dll
/r:Microsoft.Win32.InterOp.dll /out:MyForm5.exe MyForm5.cs
*/
OutPut: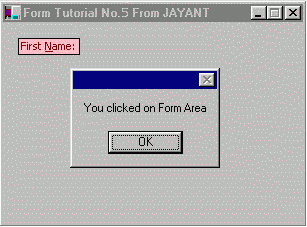
Source Code:
//MyForm6.cs
//This Tutorial will Teach Mouse clicking Events and MessageBox(with Title_Heading) calling
using System;
using System.Drawing;
using System.WinForms;
class MyForm : System.WinForms.Form
{
Label label1;
public MyForm()
{
label1 = new Label();
label1.UseMnemonic = true;
label1.Text = "First &Name:";
label1.Location = new Point(15,15);
label1.BackColor = Color.Pink;
label1.ForeColor = Color.Maroon;
label1.BorderStyle = System.WinForms.BorderStyle.FixedSingle;
label1.Size = new Size (label1.PreferredWidth, label1.PreferredHeight + 2);
//Text to be Displayed in the Caption-Title Bar
this.Text = "Form Tutorial No.6 From JAYANT";
this.StartPosition = FormStartPosition.CenterScreen;
his.AutoScaleBaseSize = new Size(5,13);
this.ClientSize = new Size(300, 200); //Size except the Title Bar-CaptionHeight
this.MinTrackSize = new Size(300, (200 + SystemInformation.CaptionHeight) );
this.AutoScroll = true;
this.MaximizeBox = false;
this.Controls.Add(label1);
this.Click += new EventHandler(clicking);
}
public void clicking(object ob, EventArgs e)
{
MessageBox.Show("You clicked on Form Area","Title_JAYANT");
}
public static void Main()
{
Application.Run(new MyForm());
}
}
/*
To Compile make a batch File in Dos Mode as compile.bat
csc /r:System.dll /r:System.Drawing.dll /r:System.WinForms.dll
/r:Microsoft.Win32.InterOp.dll /out:MyForm6.exe MyForm6.cs
*/
OutPut: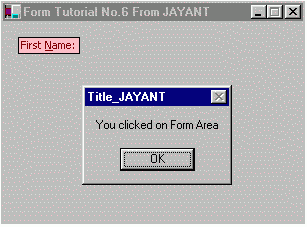
Source Code:
//MyForm7.cs
//This Tutorial will Teach Mouse clicking Events and changing the Form colour
using System;
using System.Drawing;
using System.WinForms;
class MyForm : System.WinForms.Form
{
Label label1;
public MyForm()
{
label1 = new Label();
label1.UseMnemonic = true;
label1.Text = "First &Name:";
label1.Location = new Point(15,15);
label1.BackColor = Color.Pink;
label1.ForeColor = Color.Maroon;
label1.BorderStyle = System.WinForms.BorderStyle.FixedSingle;
label1.Size = new Size (label1.PreferredWidth, label1.PreferredHeight + 2);
//Text to be Displayed in the Caption-Title Bar
this.Text = "Form Tutorial No.7 From JAYANT";
this.BackColor = Color.BurlyWood;
this.StartPosition = FormStartPosition.CenterScreen;
this.AutoScaleBaseSize = new Size(5,13);
this.ClientSize = new Size(300, 200); //Size except the Title Bar-CaptionHeight
this.MinTrackSize = new Size(300, (200 + SystemInformation.CaptionHeight) );
this.AutoScroll = true;
this.MaximizeBox = false;
this.Controls.Add(label1);
this.Click += new EventHandler(clicking);
}
public void clicking(object ob, EventArgs e)
{
MessageBox.Show("Click will change the Form Color", "Title_JAYANT");
this.BackColor = Color.Red;
}
public static void Main()
{
Application.Run(new MyForm());
}
}
/*
To Compile make a batch File in Dos Mode as compile.bat
csc /r:System.dll /r:System.Drawing.dll /r:System.WinForms.dll
/r:Microsoft.Win32.InterOp.dll /out:MyForm7.exe MyForm7.cs
*/
OutPut: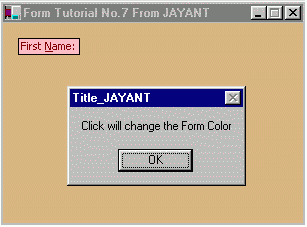
Source Code:
//MyForm8.cs
//This Tutorial will Teach Mouse clicking Events and
using System;
using System.Drawing;
using System.WinForms;
class MyForm : System.WinForms.Form
{
Label label1;
TextBox txtbx1;
Button btn1;
Button exit;
public MyForm()
{
label1 = new Label();
txtbx1 = new TextBox();
btn1 = new Button();
exit = new Button();
label1.UseMnemonic = true;
label1.Text = "First &Name:";
label1.Location = new Point(15,15);
label1.BackColor = Color.Pink;
label1.ForeColor = Color.Maroon;
label1.BorderStyle = System.WinForms.BorderStyle.FixedSingle;
label1.Size = new Size (label1.PreferredWidth, label1.PreferredHeight + 2);
txtbx1.Text = "Enter Your Name";
txtbx1.Location = new Point(15+label1.PreferredWidth+5, 15);
txtbx1.BorderStyle = System.WinForms.BorderStyle.FixedSingle;
txtbx1.BackColor = Color.LightGray;
txtbx1.ForeColor = Color.Maroon;
txtbx1.Size = new Size (90, 20);
btn1.Text = "&OK";
btn1.Location = new Point(15+txtbx1.Location.X+txtbx1.Size.Width,15);
btn1.Size = new Size (50, 20);
exit.Text = "Exit";
exit.Location = new Point(150,150);
exit.Size = new Size (90, 20);
exit.BackColor = Color.Maroon;
exit.ForeColor = Color.White;
//Text to be Displayed in the Caption-Title Bar
this.Text = "Form Tutorial No.8 From JAYANT";
this.StartPosition = FormStartPosition.CenterScreen;
this.AutoScaleBaseSize = new Size(5,13);
this.ClientSize = new Size(300, 200); //Size except the Title Bar-CaptionHeight
this.MinTrackSize = new Size(300, (200 + SystemInformation.CaptionHeight) );
this.AutoScroll = true;
this.MaximizeBox = false;
this.Controls.Add(label1);
this.Controls.Add(txtbx1);
this.Controls.Add(btn1);
this.Controls.Add(exit);
btn1.Click += new EventHandler(Btn_Clicked);
exit.Click += new EventHandler(Ext_Clicked);
}
public void Btn_Clicked(object ob, EventArgs e)
{
if(txtbx1.Text == "Enter Your Name")
MessageBox.Show("You Have'nt Entered Your Name","Title_JAYANT");
else
MessageBox.Show("Hello!!! " + txtbx1.Text,"Title_JAYANT");
}
public void Ext_Clicked(object ob, EventArgs e)
{
Application.Exit();
MessageBox.Show("Successfully Closed","EXIT");//not Shown! Do you know Why?
}
public static void Main()
{
Application.Run(new MyForm());
}
}
/*
To Compile make a batch File in Dos Mode as compile.bat
csc /r:System.dll /r:System.Drawing.dll /r:System.WinForms.dll
/r:Microsoft.Win32.InterOp.dll /out:MyForm8.exe MyForm8.cs
*/
OutPut: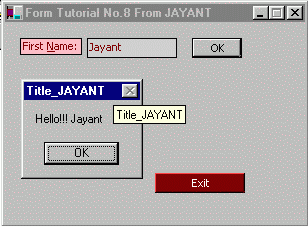
| |
CSharp and Working with Data
This article introduces SQL, shows how to use ADO.NET Datasets, and connect to SQL Server and Microsoft Access databases. It introduces data binding and shows how to build your own SQL Query program that works with Access databases.
Working with Data
Database access is the perfect example of source code reuse. The basic operations are always the same—add, retrieve, update, and delete records. The only thing different is the structure of the data. Yet, each database system has its own native programming library that is not compatible with other databases, making it difficult to port applications to other database systems. So, it is not surprising that numerous database libraries have been developed over the years to encapsulate the implementation details of database operations.
In this article, we talk about how to access a database using ADO.NET—the set of classes that .NET provides for database access.
Databases
Most business applications need to access some kind of a database. That database could be a flat file, a directory of files, or it could be a server program that handles data requests from client programs. The later case is most common because database servers are optimized for managing large amounts of data and many concurrent connections. In the case of Microsoft Access, the tables are contained within a file with the MDB extension and the "server" is the JET database engine that your program communicates with using the classes that ADO.NET provides.
A database consists of a collection of tables. Each table is defined as a set of columns and a collection of rows. Each row has a field of data for each column in its table.
A relational database is a database that defines relationships between the tables. Consider the logical relationship between a Customer table and an Orders table. A customer can have many orders, but each order can belong to only one customer. This type of relationship is called one-to-many.
The Customer record can be thought of as the parent record of each Order record belonging to that customer. If you delete the Customer record while it still has orders in the Orders table, then those orders would be orphaned records. A relational database gives us the ability make that logical relationship a physical one by putting constraints or rules on the table, such as not allowing a Customer record to be deleted if it has any Order records, preserving the integrity of the database.
A database table usually defines a primary key to uniquely identify every record in the table. The primary key is normally a combination of one or more fields in the table. If a table contains child records that are linked back to a parent record, then the value of that parent’s primary key is usually stored in the child record. It is that field that provides the link to the parent record. When a table contains a field that stores a primary key from some other table, that field is called a foreign key.
Consider two tables that store Customers and Orders. The Customer table may be defined to hold customer information and a primary key. Table 15.1 shows what a Customer table might look like.
Table 15.1 - Definition of the Customer Table
Field Name Data Type CustomerIDint, auto counter, primary keyNamestringAddressstringPhonestring
The Customer table is defined to store the Name, Address, and Phone of a Customer, as well as a CustomerID field that will uniquely identify a record in the table. The CustomerID field is the primary key.
The Customer and Orders table have a parent-child relationship, with Customers being the parent table. Each Customer can have one or more Orders, giving the tables a one-to-many relationship. The definition of the Orders table is below.
Table 15.2 - Definition of the Order Table
Field Name Data Type OrderIDint, auto counter, primary keyCustomerIDint, foreign keyOrderDateDateTimeShipDateDateTime
The Orders table definition stores the OrderID as its primary key. It also stores the CustomerID as the foreign key to link it back to the customer record of the customer who placed the order.
The Northwind Trader Database
An example of a database is the Northwind Trader database, which you can install with Microsoft Access. The Northwind Trader database is a sample database that contains tables for Customers, Orders, Employees, and other data commonly used by businesses. We will use the Northwind Trader database in the examples that follow.
Figure 15.1
Introduction to SQL
Most databases use a language called SQL, Structured Query Language, to process their commands. While SQL (commonly pronounced "sequel") is a large topic, the basics are easily grasped by looking at a few statements. The basic operations for any database are to add, retrieve, update, and delete records. The SQL language supports these operations with the following four statements.
The
INSERTStatementThe
INSERTstatement will add new records to a table. To insert a record, you must specify the name of the table and the values for the fields. The following statement inserts a new record into theCustomerstable of the Northwind Trader database.INSERT INTO Customers ( CustomerID, CompanyName )
VALUES ('SUD100', 'Jeff Suddeth')The
INSERTstatement takes the name of the table that you want to insert a record into. Then, in parentheses, you must specify the list of fields you are setting values to. After theVALUESkeyword, there is another set of parentheses that include the list of values to be assigned to the fields. The statement above creates a newCustomersrecord and sets theCustomerIDfield to"SUD100"and theCompanyNamefield to"Jeff Suddeth". All other fields will be null unless the field has a default value defined.The
SELECTStatementUse the
SELECTstatement to retrieve a set of records based on the criteria you specify. TheSELECTstatement may return zero or more records depending on the conditions of your selection. The following statement does not specify any selection criteria. It will return theCustomerIDandCompanyNamefields from every row in the table.SELECT CustomerID, CompanyName
FROM CustomersTo add search criteria to the
SELECTstatement, you can use theWHEREclause. TheWHEREclause takes a comma separated list of conditions. The following select statement will select the record we added above.SELECT CustomerID, CompanyName
FROM Customers'''The ADO.NET Classes
ADO.NET is the portion of the .NET library that deals with databases. Table 15.3 lists some of the common ADO.NET classes.
Table 15.3 – Classes of ADO.NET
Class Description DataSetA set of database tables that can be filled from a database and used as a disconnected database DataTableA collection data rows and the columns that define their structure DataRowA database Record DataViewA view of the data. Can be filtered for search criteria and sorted DataRowViewA single row from a DataView DataRelationA parent-child relationship between tables
The classes in Table 15.3 organize the data into table structures. They are declared within theSystem.Datanamespace. TheDataSetclass is one of the most useful classes in .NET; because, it encapsulates a collection of tables and the relationships between those tables. It is essentially a mini database that you can use in memory. You can also fill theDataSetwith tables and data from some other database, giving you a local cache of data.Roll Your Own Database
In this section, we use the ADO.NET classes from Table 15.3 to define a database of customer information. We will define the structure of the database by adding columns to a table named
Customers. Then, we will load some sample data into the table and persist the data to an XML file. When the program runs again, we will load the database from the XML file and print the data that it contains. The complete listing is shown in Example15_1.cs.Listing 15.1
// Example15_1.cs
using System;
using System.Text;
using System.Data;
using System.IO;

namespace csbook.ch15 {

 class CustomerDatabase {

    public void MakeFile() {
       DataSet ds = new DataSet();
       ds.DataSetName = "CustomerDatabase";

       DataTable custTable = new DataTable();
       custTable.TableName = "Customers";

       // this will be the primary key
       DataColumn custId = new DataColumn("CustID", typeof(int));

       custId.AutoIncrement = true;
       custId.AutoIncrementSeed = 101;
       custId.AutoIncrementStep = 1;
       custTable.Columns.Add(custId);

       // make this the primary key
       custTable.PrimaryKey = new DataColumn[] { custId };

       // add some fields for customer data
       custTable.Columns.Add(new DataColumn("Name", typeof(string)));

       custTable.Columns.Add(new DataColumn("Phone", typeof(string)));

       custTable.Columns.Add(new DataColumn("Email", typeof(string)));

       // add the table to the DataSet
       ds.Tables.Add(custTable);


       // add some records to the table
       DataRow row;
       row = custTable.NewRow();
       row["Name"] = "Evy";
       row["Phone"] = "123-555-9876";
       row["Email"] = "evy@evymail.com";
       custTable.Rows.Add(row);

       row = custTable.NewRow();
       row["Name"] = "Jon";
       row["Phone"] = "123-444-7384";
       row["Email"] = "jon@jonsmail.com";
       custTable.Rows.Add(row);

       row = custTable.NewRow();
       row["Name"] = "Eric";
       row["Phone"] = "123-666-7398";
       row["Email"] = "eric@ericsmail.com";
       custTable.Rows.Add(row);

       // dump to XML
       ds.WriteXml("customers.xml");

       Console.WriteLine("The file was created");
       }

    public void ReadFile() {
       DataSet ds = new DataSet();
       ds.ReadXml("customers.xml");

       foreach (DataRow row in ds.Tables[0].Rows) {
          // get the data
          string name = (string)row["Name"];
          string phone = (string)row["Phone"];
          string email = (string)row["Email"];

          // build the string
          StringBuilder builder = new StringBuilder();
          builder.AppendFormat
             ("Name: {0}\t Phone: {1}\t Email: {2}",
               name, phone, email);
          // write the string
          Console.WriteLine(builder.ToString());
          }
       }

    public void Test() {
       if (File.Exists("customers.xml")) {
          ReadFile();
          }
       else {
          MakeFile();
          }
       }

    static void Main(string[] args) {
       CustomerDatabase db = new CustomerDatabase();
       db.Test();
       }
    }
 }
Listing 15.1 defines the Customers table to have the structure shown below.
Table 15.4 – The Customers Table
Field Name Data Type CustIDint, auto increment, primary keyNamestringPhonestringstringTo define the table, we create a
DataTableobject and set itsTableNameproperty to"Customers". TheDataTablehas a property namedColumns, which is a collection ofDataColumnobjects that define the columns of the table. Another important property of theDataTableis thePrimaryKeyproperty. ThePrimaryKeyproperty is an array ofDataColumnobjects. You can set the primary key by creating an array of one or moreDataColumnsfrom the table and assigning a reference to that array in thePrimaryKeyproperty.The
DataColumnclass has many properties, many of which you won’t care about for the examples here. However, two important properties are theNameandDataType.The
Nameproperty is a string value that names the field. When you access a column of aDataRowyou can use this name as an index instead of an integer; so, you don’t have to remember the order of the columns.The
DataTypeproperty stores an instance of theTypeclass containing the type of data the column will store. The data are stored in the fields as object references so you can use any C# data type. If theDataTypeof a column isint, then you can set the column’sAutoIncrementproperty totrue. If theAutoIncrementproperty istrue, then the column’s value will be set automatically from a counter variable that is incremented every time a new row is created. This guarantees that the field will hold a unique value for each row in the table and makes the field a good candidate to use as a primary key.Defining the Table Structure
The following code segment defines the
DataTable custTable = new DataTable();Customertable structure. TheCustIDfield is defined as anauto counterfield and used as the primary key.
custTable.TableName = "Customers";
// this will be the primary key DataColumn custId = new DataColumn("CustID", typeof(int)); custId.AutoIncrement = true;
custId.AutoIncrementSeed = 101;
custId.AutoIncrementStep = 1;
Columns.Add(custId);
// make this the primary key
custTable.PrimaryKey = new DataColumn[] { custId };
// add some fields for customer data custTable.Columns.Add(newDataColumn("Name", typeof(string)));
custTable.Columns.Add(new DataColumn("Phone", typeof(string))); custTable.Columns.Add(new DataColumn("Email", typeof(string)));Reading Rows of Data
The
DataTablealso has a property namedRowsthat stores the rows of data. The rows are actually objects of theDataRowclass. TheDataRowstores a collection of values that you can read or write to using an index. You can either use an integer—if you know the order of the columns—or you can use the name of the field. The following code segment loops through the table’s rows and obtains references to theName,Phone, andforeach (DataRow row in ds.Tables[0].Rows) {
// get the data
string name = (string)row["Name"];
string phone = (string)row["Phone"];
string email = (string)row["Email"];
}The
DataRowstores the values as object references so the data must be cast to the appropriate type before we can use it. In this case, we used strings.Adding Rows of Data
We obviously need to add new rows to the table, too. To create a
DataRowobject, we call theTable’sNewRowmethod. That method will instantiate aDataRowobject and set its auto increment field for the primary key. Then, we can set the other values of the record and add the row into theTable’sRowscollection.DataRow row = custTable.NewRow();
row["Name"] = "Evy";
row["Phone"] = "123-555-9876";
row["Email"] = "evy@evymail.com";
custTable.Rows.Add(row);Storing the Data as XML
The
DataSetstores a collection ofDataTables in itsTablesproperty. To dump the entire DataSet to an XML file, we need to call theDataSet’sWriteXmlmethod, passing the name of the file as a string. Reading the file back in is just a matter of calling theReadXmlmethod.ds.WriteXml("customers.xml"); // dump to XML
ds.ReadXml ("customers.xml"); // restore from XMLFiltering the Data with the DataView
The
DataViewclass can be used to create a new view of the table that can be filtered or sorted without affecting the underlying table. TheDataViewis similar to a table in that it has a collection of rows but the objects in theDataView’sRowscollection are of typeDataRowView. You use theDataRowViewthe same as you would use aDataRow. You use the name of the field as an index to get the value from the column. Once you have aDataView, you can filter or sort the data without affecting the actual table.You create a
// create a view that can be filtered and sorted DataView view = new DataView(ds.Tables[0]); foreach (DataRowView drv in view) { Console.WriteLine(drv["Name"].ToString()); } // find the record for Rick view.RowFilter = "Name = 'Evy'"; foreach (DataRowView drv in view) { Console.WriteLine(drv["Name"].ToString()); }DataViewby passing aDataTableto theDataViewconstructor.In the code segment, we create a
DataViewfor the firstDataTablein theDataSet’sTablescollection. Then, we loop through theRowscollection, printing out theNamefield as we go. Then, we filter the view so that view only contains records where theNamefield is"Evy". Theforeachloop iterates through each row in the view of"Evy"records and prints out theNamefield.Table 15.5 – OLEDB Database Classes
Class Description OleDbConnectionThe physical database connection OleDbCommandA command to execute on the database OleDbDataAdapterMoves data between the DataSet and the physical Database using a connection and a command OleDbDataReaderCan iterate results returned from a command Now that you have been introduced to the ADO.NET classes, it is time to write some real code. The example in the next section connects to the Microsoft Access Northwind Traders database using the OleDb classes.
Connecting to Access using OLE DB
In this section, we will use the Northwind Trader database that installs (optionally) with Microsoft Access. The program is a Console Application that simply loads a
DataSetfrom theCustomerstable of the database. Then, we loop through the records, printing theCustomerNamefield to the screen.Listing 15.2
// Example15_2.cs
using System;
using System.Data;
using System.Data.OleDb;

namespace csbook.ch15 {

 class Example15_2 {

    static void Main(string[] args) {
       string conString =
            @"Provider=Microsoft.JET.OLEDB.4.0;"
          + @"data source=c:\data\Northwind.mdb";


       // create an open the connection
       OleDbConnection conn = new OleDbConnection(conString);
       conn.Open();

       // create the DataSet
       DataSet ds = new DataSet();

       // create the adapter and fill the DataSet
       OleDbDataAdapter adapter =
          new OleDbDataAdapter("Select * from Customers", conn);
       adapter.Fill(ds);

       // close the connection
       conn.Close();

       DataTable dt = ds.Tables[0];
       foreach (DataRow dr in dt.Rows) {
          Console.WriteLine(dr["CompanyName"].ToString());
          }
       }
    }
 }
The listing first creates a connection string that provides information to the
OleDbConnectionclass. Specifically, the connection string contains the provider for the database engine that we want to connect to and the data source, which in this case is a Microsoft Access file. If the file were password protected, we would also specify a User ID and Password in the connection string. After creating the connection string, the program creates anOleDbConnectionobject, passing the connection string as the argument.Next, the listing opens the database connection by calling the connection’s
Openmethod. It also creates an emptyDataSetthat will later be filled from the database.The
OleDbAdapterclass encapsulates the command to fill theDataSet. We create the adapter by passing a SQL query string and the database connection to its constructor. This query string will select all fields of all rows from theCustomerstable. The adapter’sFillmethod will execute the query through the connection and load the results into theDataSetthat we pass to it. The results include the data from the query as well as the metadata, defining its structure. When the call is complete, theDataSetwill contain a table with all theCustomerrecords from the database. At that point, we can close the database connection so that it can be used by some other application.The tables within the
DataSetare represented by theDataTableclass. EachDataTablehas a collection ofDataRowobjects storing the rows from the query. Theforeachloop iterates through theDataRows, displaying theCompanyNamefield. TheDataRowobject uses the string"CompanyName"as an index to find the field of that name and retrieve its value. The value is returned as anobjecttype. Calling the virtualToStringmethod will result in displaying the string value of the field.Connecting to a SQL Server Database
The SQL Server versions of the connection, command, and adapter classes are listed below in Table 15.6. They are defined in the
System.Data.SqlClientnamespace.Table 15.6 – SQL Server Database Classes
Class Description SqlConnectionThe physical database connection SqlDataCommandA command to execute on the database SqlDataAdapterMoves data between the DataSet and the physical Database using a connection and a command SqlDataReaderCan iterate results returned from a command SQL Server also installs a copy of the Northwind Trader database. The next example is similar to the previous except that it uses the SQL Server versions of the connection and adapter.
While the previous listing used an adapter to execute a command internally and fill a
DataSet, this example uses the command object directly. The program calls theSqlCommandobject’sExecuteReadermethod, which returns aSqlReaderobject. Then, it uses theSqlReaderto loop through the records that have been returned.Listing 15.3
// Example15_3.cs
using System;
using System.Data;
using System.Data.SqlClient;

namespace csbook.ch15 {

 class Example15_3 {
    static void Main(string[] args) {
       // create an open the connection
       SqlConnection conn =
          new SqlConnection("Data Source=DESKTOP;"
             + "Initial Catalog=Northwind;"
             + "Persist Security Info=True;"
             + "User ID=jeff;Password=password");

       conn.Open();

       // create a SqlCommand object for this connection
       SqlCommand command = conn.CreateCommand();
       command.CommandText = "Select * from Customers";
       command.CommandType = CommandType.Text;

       // execute the command that returns a SqlDataReader
       SqlDataReader reader = command.ExecuteReader();

       // display the results
       while (reader.Read()) {
          string output = reader["CompanyName"].ToString();
          Console.WriteLine(output);
          }

       // close the connection
       reader.Close();
       conn.Close();
       }
    }
 }
Data Binding
Window controls have the ability to bind their properties to the properties of other objects. When two properties are bound, a change in one is reflected in the other.
For example, consider the following listing for the
class Student { private string name; private double gpa; public string Name { get { return name; } set { name = value; } } public double Gpa { get { return gpa; } set { gpa = value; } } }Studentclass. TheStudenthas two properties—the string valueNameand the double valueGpa.If we declare an instance of the
// create the student student = new Student(); student.Name = "Jeff"; student.Gpa = 4.0; // bind the properties textBox1.DataBindings.Add(new Binding("Text", student, "Name")); textBox2.DataBindings.Add(new Binding("Text", student, "Gpa"));Studentas a member of a WindowsForm, we can bind theNameandGpaproperties to theTextproperties of a pair ofTextBoxes.We can also put a
private void testButton_Click(object sender, EventArgs e) { MessageBox.Show("Name: " + student.Name + " GPA: " + student.Gpa); }Buttonon theFormthat displays the current values of the student’sNameandGpa. This allows us to view the changes made to the object after we change the text in theTextBox.Running the example, we can see that when the form first opens the initial values are displayed.
Figure 15.2

Then, we can change the text in the text boxes and click the
Test Button. The message box displays the values of the student object, which have been changed to the new values in theTextBoxes.Figure 15.3

This type of data binding is called simple data binding. We can also bind a
public partial class Form1 : Form { string[] names = { "Jeff", "Rachel", "Katy", "Evy", "Ben" }; public Form1() { InitializeComponent(); } private void Form1_Load(object sender, EventArgs e) { listBox1.DataSource = names; } }ListBoxcontrol to an array or collection of data. Binding to a collection of data is called complex data binding. To bind theListBoxto a collection you set theListBox’sDataSourceproperty. TheListBoxwill display the first public property of each item in the collection in its list. The next example binds an array of strings to aListBox.When the form is displayed, the names in the string array appear in the
ListBox.Figure 15.4

Using the
DataGridViewThe
DataGridViewis a control designed to be bound to database tables. You will find theDataGridViewin the Data group on your Toolbox. In this section, we will use theDataGridViewto build a SQL interface for the Northwind Trader database. This application is surprisingly simple using the classes provided by ADO.NET.Figure 15.5

To create the user interface, place a
TextBoxon the form and set itsMultilineproperty totrue. Then, add two buttons, setting theirTextproperties toQueryandUpdate. Finally, place aDataGridViewcomponent on the form. Your form might look something like the one in Figure 15.5.Since we are going to connect to a Microsoft Access database, we need to use the
OleDbclasses. At the top of the file, you should add the followingusingstatement to gain access to theSystem.Data.OleDbnamespace.using System.Data.OleDb;The
Form’sLoadevent should create anOleDbConnectionobject, anOleDbCommandobject, and aDataSetobject. Each of these objects should be stored as members of yourFormclass.private void Form1_Load(object sender, EventArgs e) {
// connect to the database
string conString =
@"Provider=Microsoft.JET.OLEDB.4.0;"
+ @"data source=c:\data\Northwind.mdb";
// create an open the connection
conn = new OleDbConnection(conString);
command = conn.CreateCommand();
// create the DataSet
DataSet ds = new DataSet();
}Next, you need to implement the select button’s
Clickhandler. The method should start by clearing theDataSourceproperty of theDataViewGridand creating a freshDataSet. Then, it should reopen the connection. Set theCommandobject’sCommandTextproperty to theTextfrom theTextBoxcontrol. Then, create an adapter with the command and fill the newDataSet. Finally, set theDataGridView’sDataSourceproperty to the first table in theDataSet’sTablecollection.private void button1_Click(object sender, EventArgs e) {
// clear the grids data source
dataGridView1.DataSource = null;
// create a new DataSet
ds = new DataSet();
// open the connection
conn.Open();
// run the query
command.CommandText = textBox1.Text;
adapter = new OleDbDataAdapter(command);
adapter.Fill(ds);
// close the connection
conn.Close();
// set the grid's data source
dataGridView1.DataSource = ds.Tables[0];
}The last step is to implement the
Clickevent handler for theUpdatebutton.private void button2_Click(object sender, EventArgs e) {
// clear the grids data source
dataGridView1.DataSource = null;
// open the connection
conn.Open();
// run the query
command.CommandText = textBox1.Text;
int affected = command.ExecuteNonQuery();
MessageBox.Show ("There were " + affected + " rows affected");
// close the connection
conn.Close();
}The update button sets the
DataGridView’sDataSourceproperty tonullto clear the grid. Then, it reopens the connection and sets the command object’sCommandTextproperty to whatever text is in theTextBox. This time the command is executed by theExecuteNonQuerymethod. TheExecuteNonQuerymethod runs a command that updates or deletes records. It returns the number of rows affected by the command. Finally, the method displays a message box showing the number of rows affected and then closes the connection. Figure 15.6 shows aSELECTstatement being executed on the database.Figure 15.6

Figure 15.7 shows the update button being used to change the
ContactTitlefromGurutoFool.Figure 15.7

To verify that our update actually worked, we can run the query again.
Figure 15.8


Subscribe to:
Posts (Atom)